How to create 360 tours yourself with LookAround in 4 simple steps
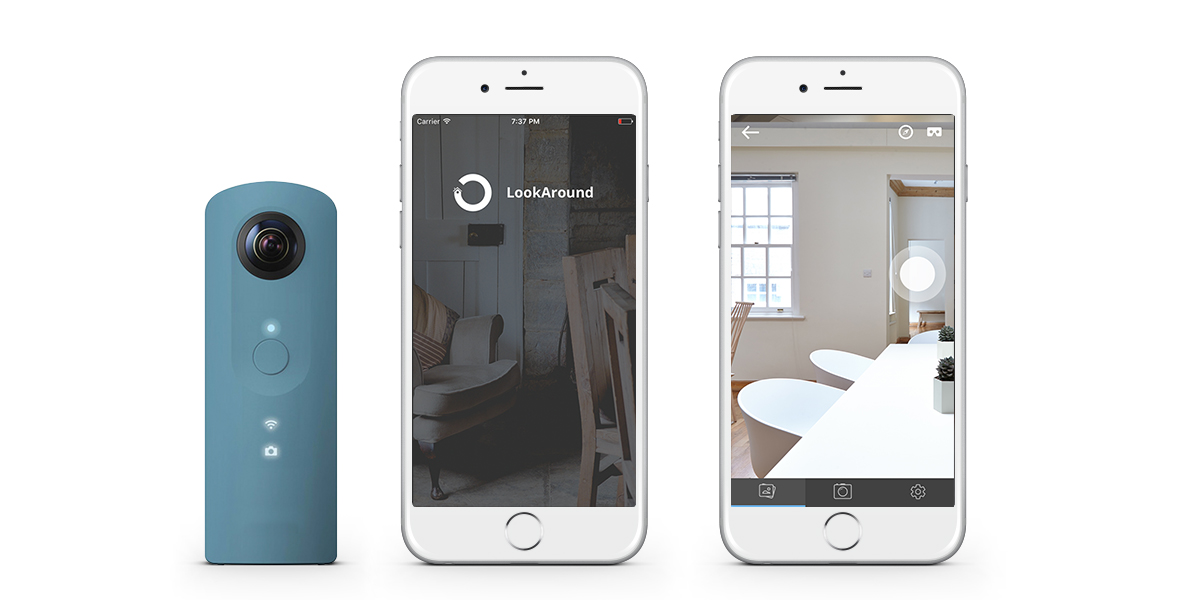
This article will introduce you to the LookAround 360 virtual tour app and show you how you can easily create a 360 tour yourself within minutes using your smartphone.
The capturing process is done in 4 simple and straight forward steps and doesn’t require any specific knowledge or experience.
Capturing a 2-3 bedroom apartment takes roughly 10-15 minutes. Once you’re done you can integrate the virtual tour into your website or supported property portals in Dubai and Germany*.
* Dubai: PropertyFinder, Dubizzle; Germany: ImmobilienScout24
Let’s start by connecting your phone to the 360 camera.
1. Connecting to the 360 camera
We currently support multiple 360 cameras. In order to keep things simple we are going to use the Ricoh Theta 360 camera in this how-to. The camera automatically opens a WiFi hotspot when it’s being turned on. Please note that this doesn’t mean you need a working WiFi network in order to use the camera. The camera simply opens a network which is used to transfer the data from the camera onto your phone.
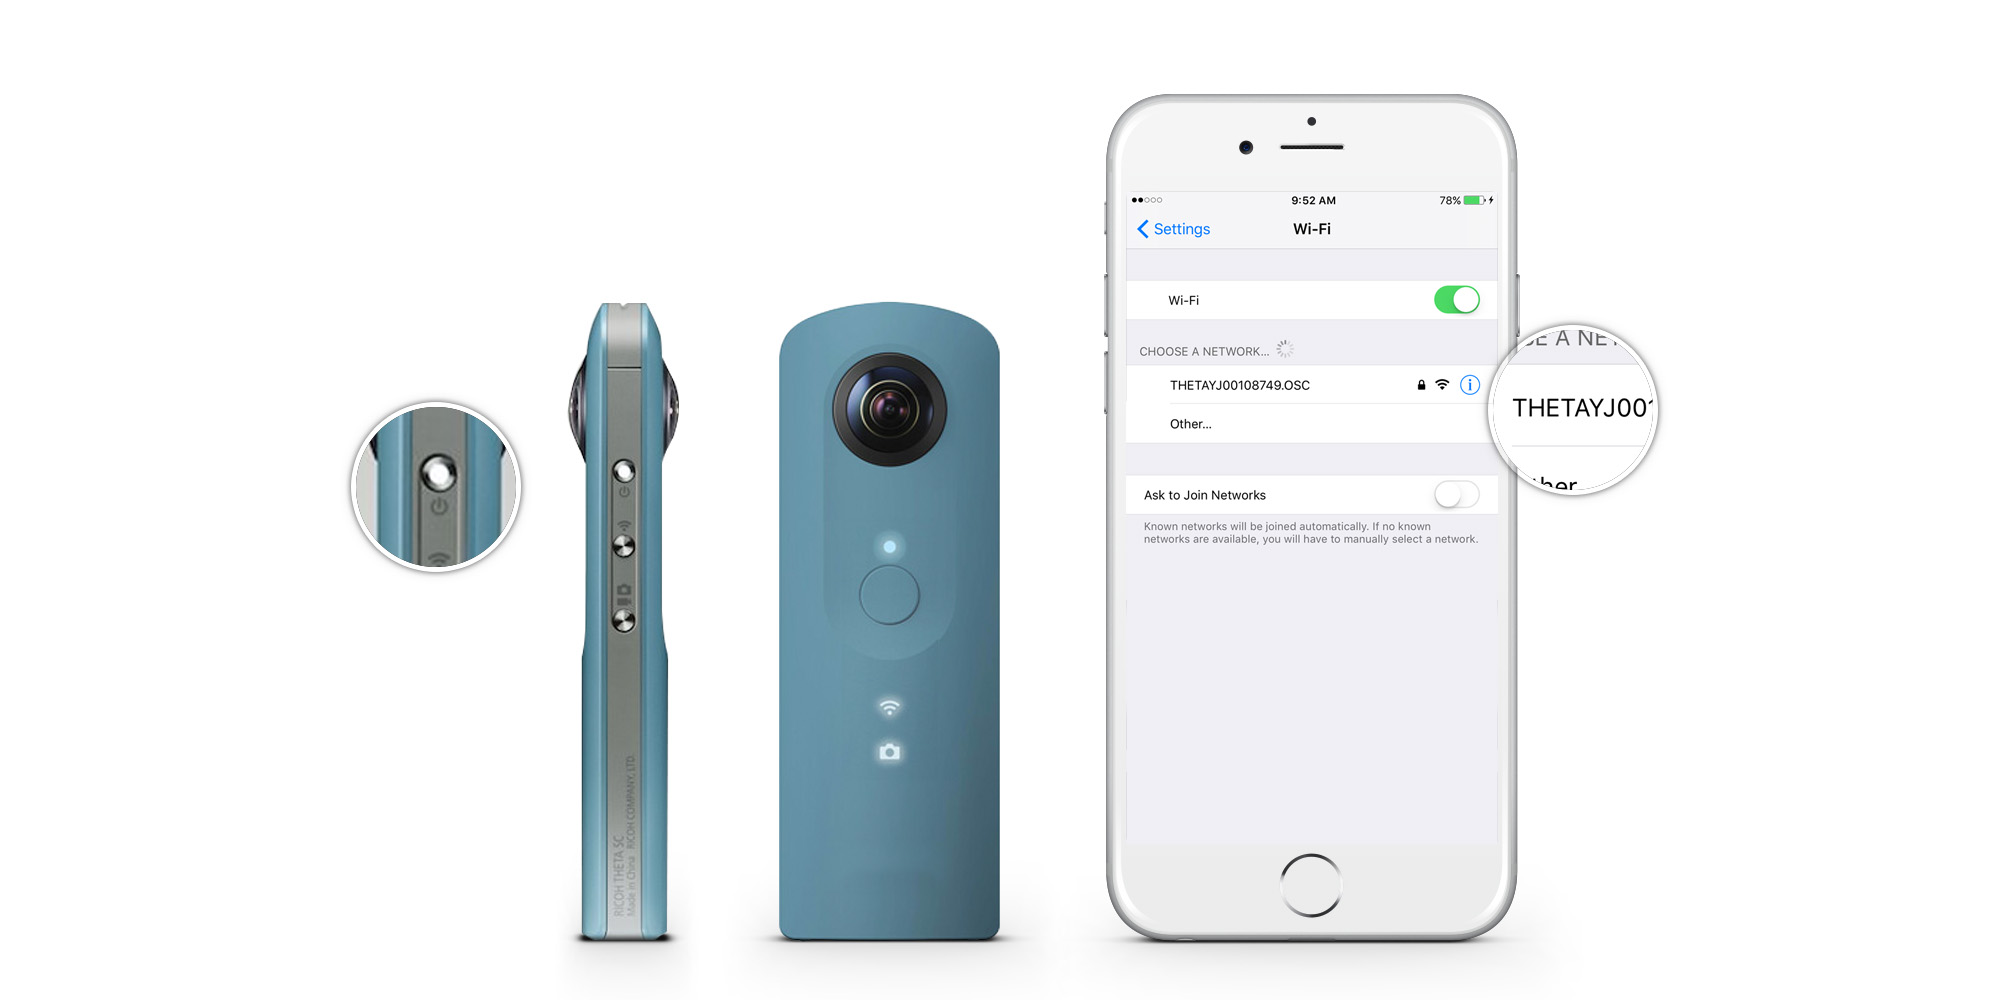
Go to “Settings” -> “Wi-Fi” and you will see the network of the camera. Connect to the WiFi network which starts with “THETA”. In our example the network is called “THETAYJ00108749.OSC”. The password is the numbers out of the network name. Applied to our example this would be “00108749”.
After you’re connected to the WiFi network you can go ahead and open the LookAround – Virtual Tour App.
2. Capturing 360 images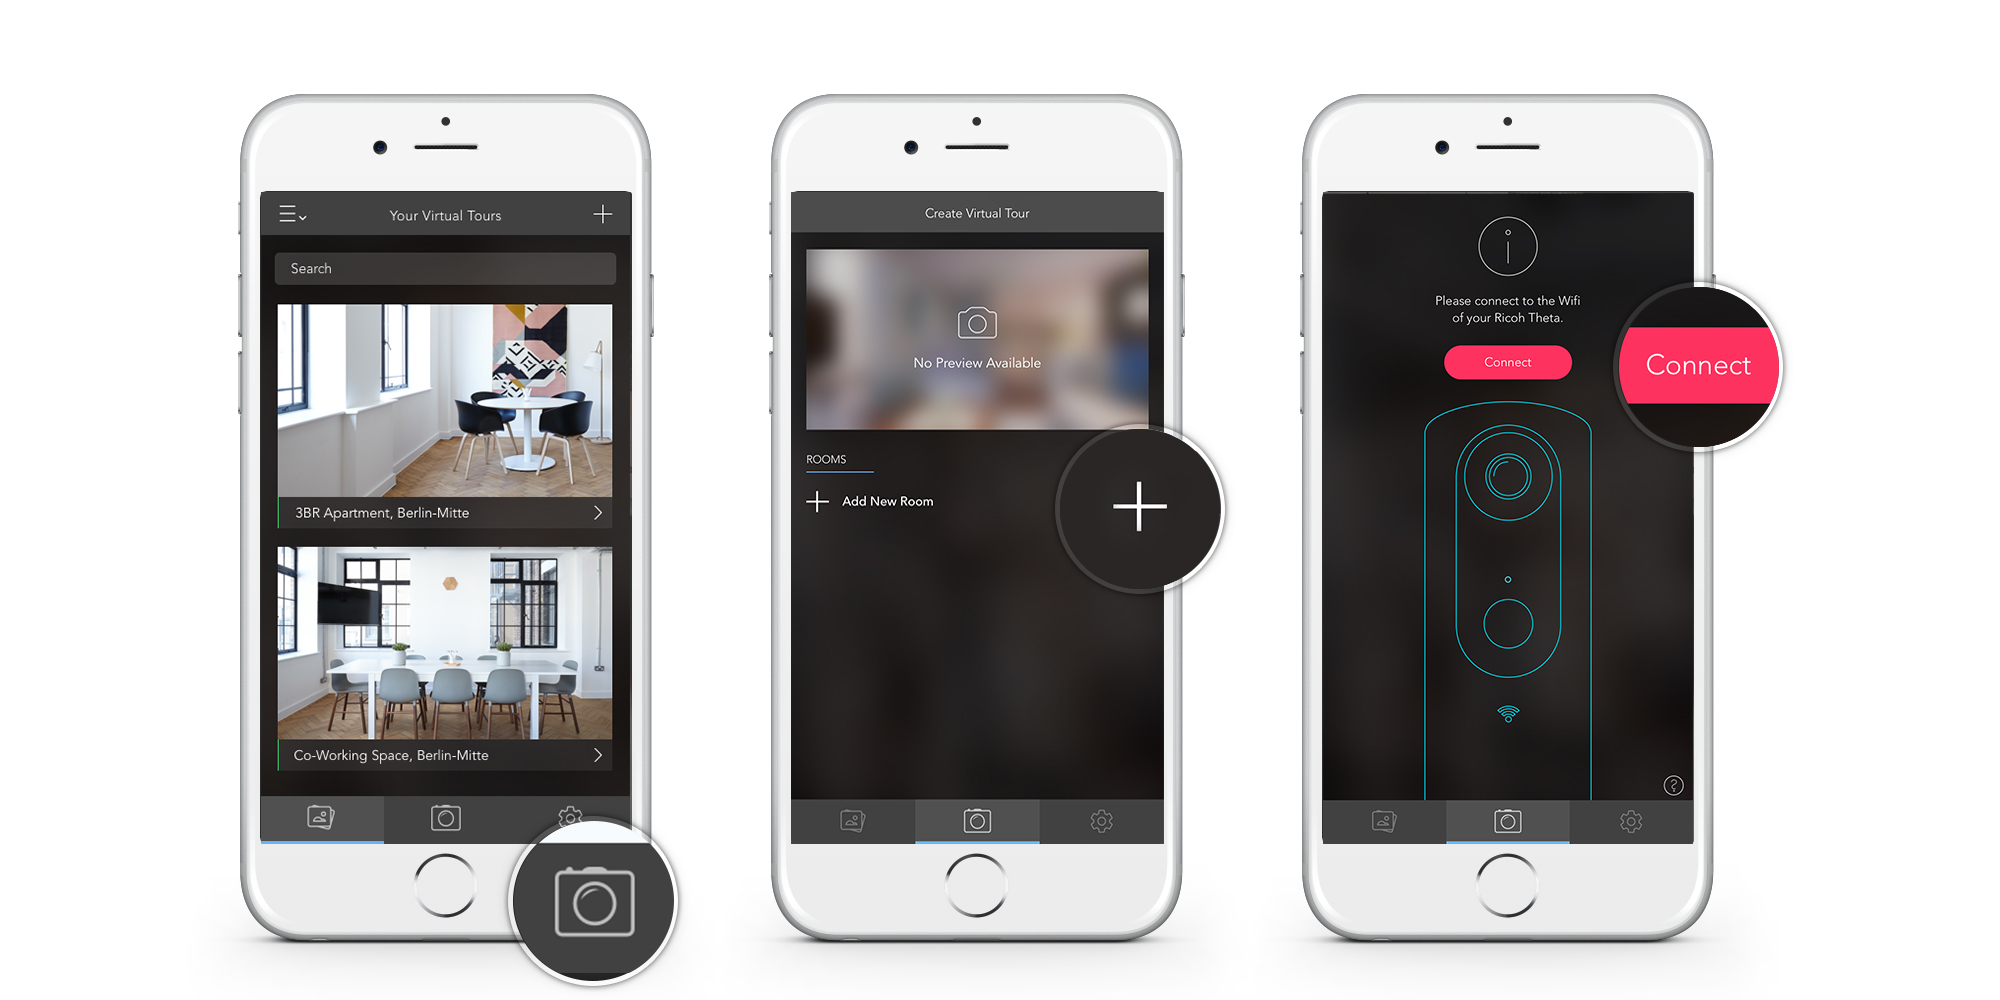
The start screen shows all virtual tours currently stored in your library. By clicking on the “Camera” icon in the tab bar you can switch into the “Create Virtual Tour” mode. Each virtual tour consists of multiple 360 images, which mostly represent rooms in an apartment or house. By clicking on the “+” icon, you can go ahead and add a room to your new virtual tour.
Before you can actually take the first image, tap the “Connect” button. If you’ve successfully connected to your 360 cameras WiFi network, then the capturing screen will appear.
In case you receive an error message, please double check that you’re successfully connected to the WiFi hotspot of your 360 camera.
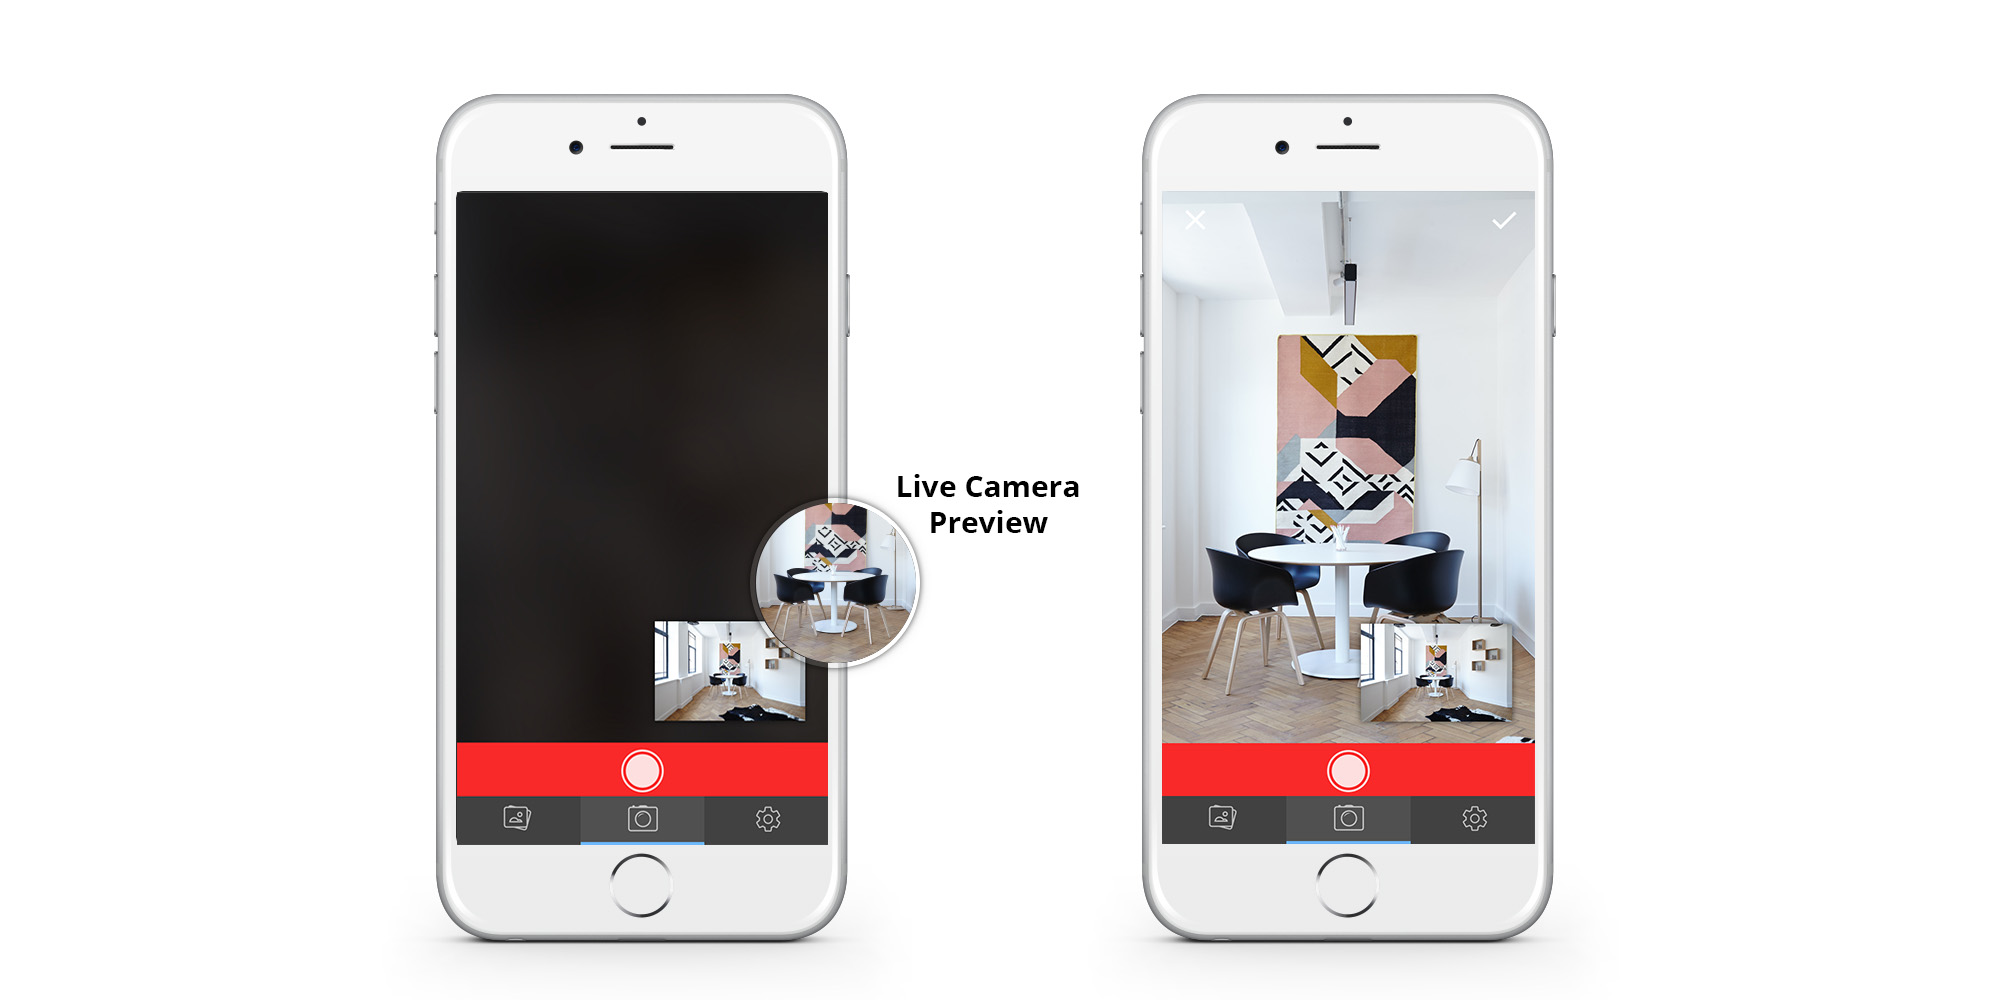
The next screen shows a live preview of what the 360 camera sees in the bottom right corner. This way even when you leave the room in order to take the 360 image, you will be able to see the current viewport of the camera.
By clicking on the red “Capture” button the camera will take the image. A beep-noise will indicate that image was successfully taken. Afterwards the phone downloads the image from the camera, which takes on average 20-30 seconds. When the image transfer is completed, the image will be displayed and you can directly interact with the image using your finger to pan around.
If you’re happy with the image, you can confirm it by tapping on the “Check” icon in the top right corner.
The app will ask you to type in a room name (e.g. Living Room, Bathroom, …).
You have now taken the first image of your 360 tour. In order to complete the tour you will now create so called hotspots, that link the images to a tour and will later allow users to walk between different rooms in the tour.
3. Linking rooms to a full 360 tour
Now that you’ve successfully taken the first image it’s time to create a hotspot in order to link to the next image that you want to take. Links between images are created through so called “Hotspots”, which allow users later to virtually walk through the 360 tour.
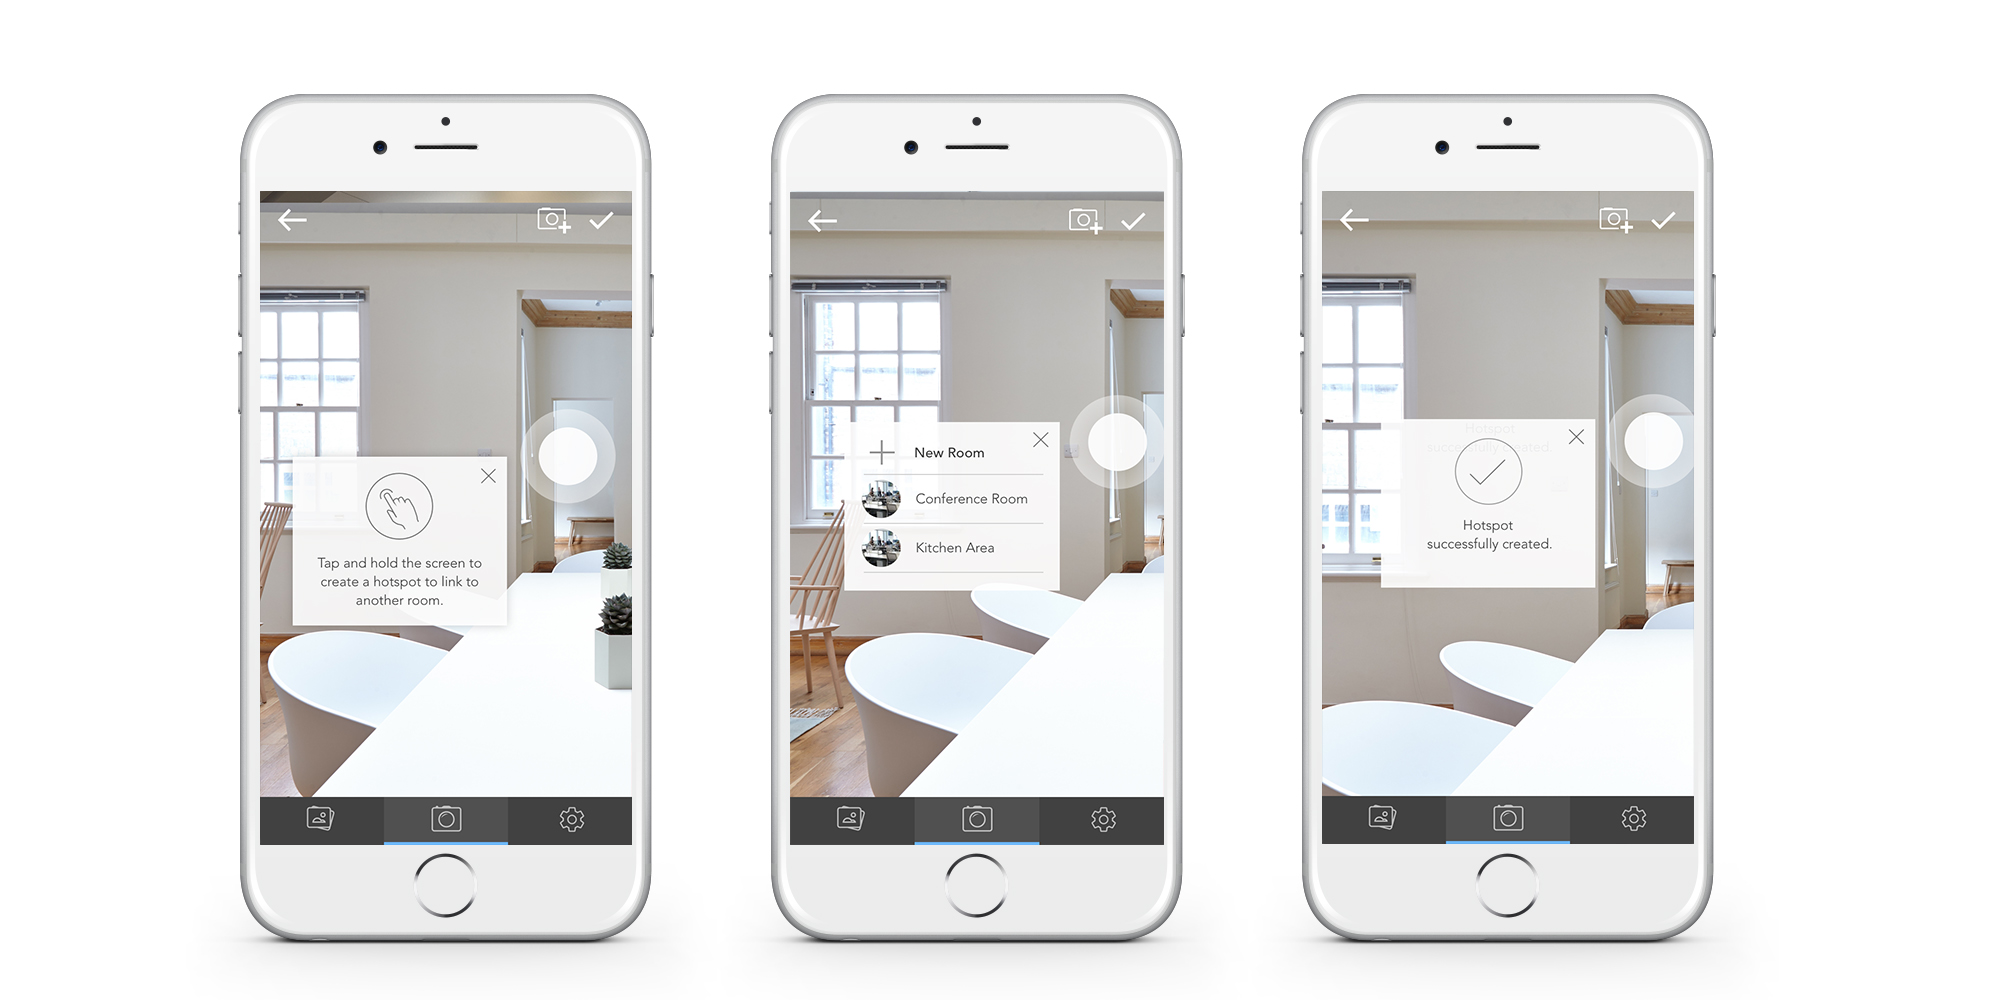
If you use the app for the first time a tooltip will be displayed explaining how you create your first hotspot. Simply tap & hold the screen at the position where you want to create a hotspot and thus take the next image.
A dropdown menu will appear showing you a list with all previously recorded rooms within your 360 virtual tour and a button that allows you to create a link to a new room. Click on “New Room” in order to capture the second image of your tour. You can now start recording the second room just like explained for the first image.
This way you’ll walk through your property and capture each room while creating the links between the rooms while you’re on-site.
Once you’re done with all rooms, simply click on the “Check” icon in the top right corner to complete the capturing. The following screen will give you a final overview of all rooms. By tapping on “Next” the final virtual tour details screen will be display.
4. Upload & Share your tour
Since you’ve now recorded all images of your 360 tour with the LookAround app, you’ll get a final overview of the tour. The virtual tour details screen will allow you to enter details for the virtual tour as well as enable you to edit the tour at a later stage (edit hotspots, add 360 images, edit details, …)

By clicking on the “Save” button the virtual tour is directly uploaded to the LookAround server. A loading indicator next to the carrier will indicate the upload process and will disappear once the upload is finished.
By taping on the “Share” icon you can receive the link to you virtual tour, which you can then either copy and save or integrate into your favorite property portal in Dubai or Germany or even your own website.
That’s it! You have now created your first 360 virtual tour using the LookAround app.


